Hikvision access control lets you secure one door or hundreds using controllers, terminals, readers and intercoms that support multiple authentication methods. Cards, PIN codes, fingerprints, facial recognition and palm recognition all work in the same ecosystem.
You can link cameras, door stations, indoor stations and alarms, enrol users by QR code and Bluetooth, manage day to day tasks in an app, and export attendance reports.
This guide shows you how to plan, install, configure and maintain a Hikvision access system using practical steps and model examples.
Access Control Overview
Access control verifies a person’s credential, decides whether to open the door, and records the event. A typical loop includes an access control terminal or card reader, an access controller, an electric lock, a door contact, a request to exit, and a secure network connection to your management software.
Supported credentials include MIFARE card, DESFire card, FeliCa card, PIN code, fingerprint, facial recognition and QR code
Common interfaces include a Wiegand interface, RS-485 and TCP/IP, with Wi Fi available on selected terminals
Events are logged for audit, alarms and attendance, which helps with timekeeping and incident reviews
Why many sites choose Hikvision
Multiple authentication methods and simple multi factor rules
Deep learning recognition on advanced terminals with anti spoofing to prevent photographs being used to open a door
Tight integration with cameras, door stations, indoor stations and alarm inputs and outputs
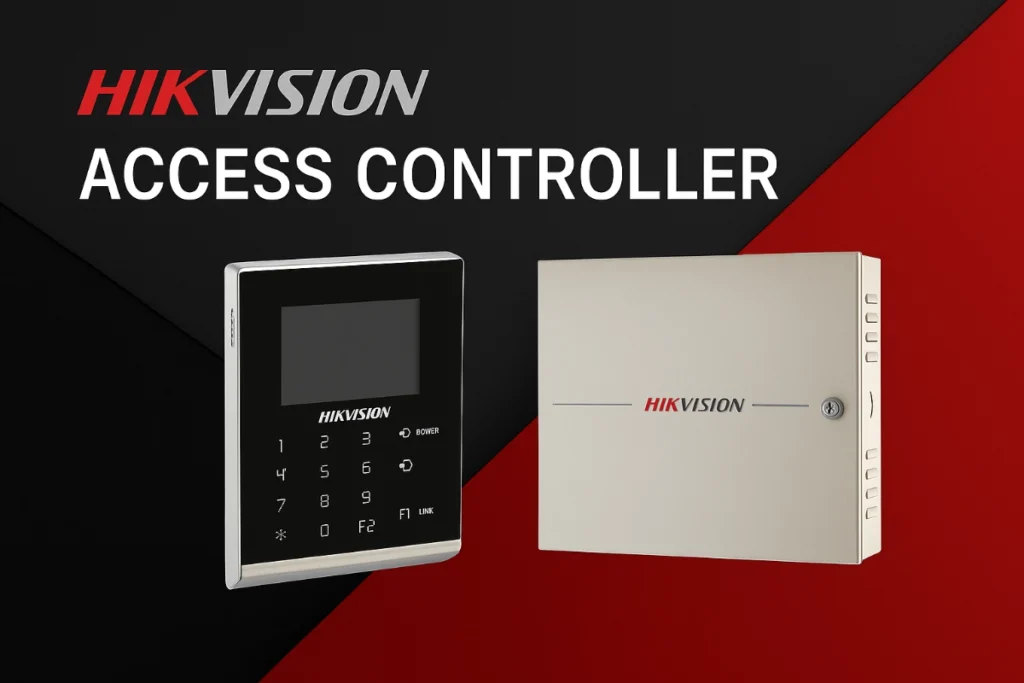
Access Controller
An access controller is the brain of the door. It checks the presented credential against user rights, schedules and Anti Passback, then energises the lock through a correctly sized power supply. In busy areas, controllers coordinate Multi Door Interlocking so only one door in a set can be open at a time.
Design notes
Choose single, double or four door controllers to match your plan
Use TCP/IP for management, RS-485 for peripherals and a Wiegand interface for readers
Keep controllers close to doors to reduce voltage drop and simplify cable runs
Segment the security network and reserve static IP addresses for fixed devices
Models to know
DS-K1T105AM is a single door attendant access controller with TCP/IP, RS-485 and Wiegand connectivity
DS-K2604-G is a four door access controller with TCP/IP, RS-485, Wiegand and built in Multi Door Interlocking for higher security areas
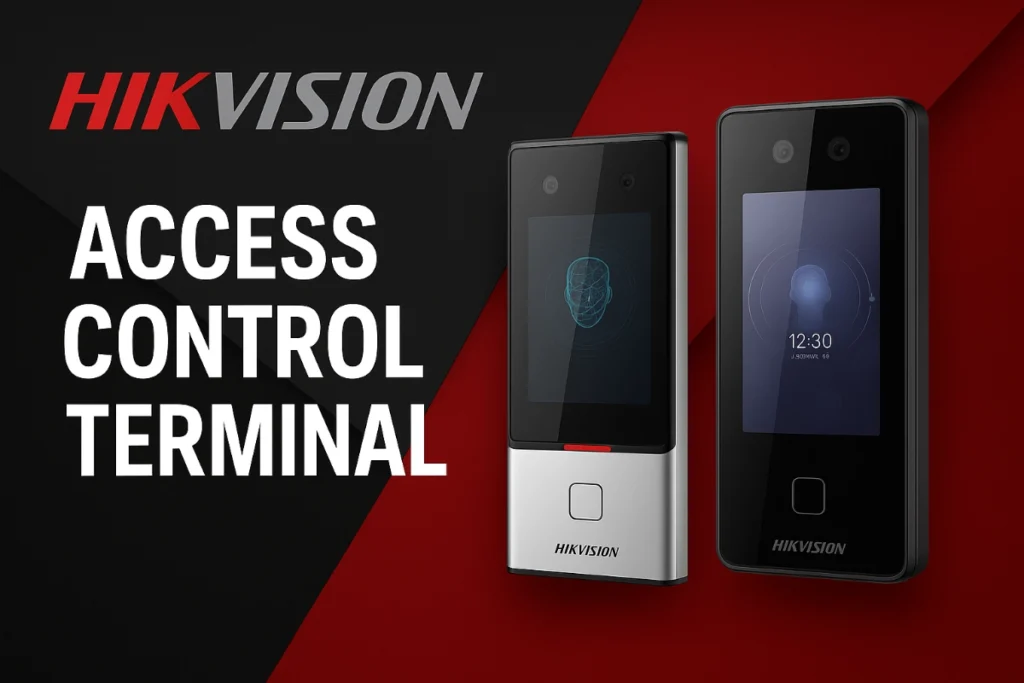
Access Control Terminal
A Hikvision recognition terminal sits at the entry and verifies the person in front of it. Modern models use deep learning for face, fingerprint and palm recognition. Advanced terminals include anti spoofing to stop photos or videos being used to open a door.
Where a terminal makes sense
Main entries and reception for fast face recognition and clear visual logs
Staff entrances where fingerprint or card plus PIN gives stronger security
Internal rooms that benefit from Anti Passback and tighter schedules
Key capabilities
Multiple authentication methods including card, face, fingerprint and PIN, with simple multi factor combinations
Connectivity options including TCP/IP for management, RS-485 or a Wiegand interface for readers, and Wi Fi on selected units for flexible deployments
Attendance and audit with automatic event recording for timekeeping and compliance
Representative terminals
DS-K1T341AM face access terminal with TCP/IP, RS-485 and Wiegand
DS-K1T341AMF face and fingerprint terminal for doors that need stronger verification
DS-K1T606MF face recognition terminal with a 5 inch touch screen and a 2 MP WDR camera for high traffic doors
DS-K1T502DBWX-C video intercom style terminal with a built in MIFARE module and Bluetooth, ideal where door station features are useful
Door Station
A door station manages calls, video and door release at an entry. In a Hikvision ecosystem it pairs with indoor stations for two way audio, visitor preview and controlled unlocks.
Practical usage
Staff can present a card or PIN to open the door
Visitors press call, the indoor station rings, and staff can talk, view and grant access
Use the cancel option on the indoor station to end a visit without opening
Helpful integrations
Link the door station to cameras for recording
Link to the access controller for logging
Link to alarms for door forced and door held alerts
Indoor Station
An indoor station is the operator screen for reception or security. It connects to door stations and controllers so staff can monitor doors, talk with visitors and open a door remotely. It also displays basic system status and alarms.
Setup tips
Place indoor stations on the same network segment as door stations for low latency
Use web configure pages to set room numbers, call routing and door release times
Train reception to verify visitors before unlocking
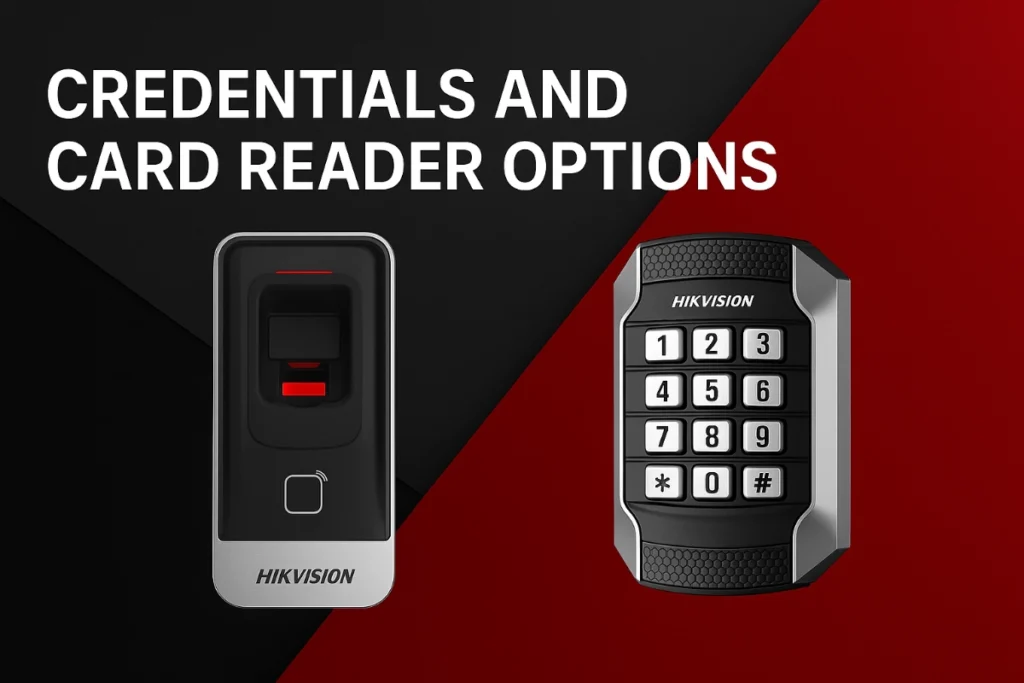
Credentials And Card Reader Options
Pick credentials that balance convenience and security, then match the reader to the environment.
Credential types
MIFARE Card is reliable and common for staff credentials
DESFire Card Reading Module provides stronger encryption for higher security
FeliCa Card suits campuses and workplaces that already use it
Keypad And PIN Code should be paired with a card or face for multi factor
QR Code is ideal for short term visitors and contractors
Plug And Play USB enrolment readers with no driver technology speed up card issuance at a desk
Reader choices
DS-K1104MK vandal proof card reader with a 50 mm reading range and IP65 rating, suited to external entries
DS-K1201MF fingerprint and card reader with a 50 mm reading range and IP65 rating for stronger authentication at staff entrances
Best practice
Avoid single factor on perimeter entries
Mount readers at appropriate height and angle for the user group
Set distinct schedules for people, visitors and contractor cards to reduce risk
Planning And Design Checklist
Before you order hardware, map the site and decide on the topology.
Confirm door count and door risk levels
Choose single, double or four door control and plan Multi Door Interlocking zones
Decide where recognition terminals are needed versus simple card readers
Specify lock types, exit buttons and door contacts for each door
Allocate a dedicated power supply per controller or per door loop
Reserve static IP addresses and a security network segment
Plan for Anti Passback where strict entry then exit is required
Document evacuation paths and which doors should unlock during emergencies
Installation And Wiring Basics
Safe and tidy wiring avoids faults and speeds up commissioning.
Use a dedicated low voltage power supply sized to the lock current and the number of devices on the loop
Run separate cables for lock power and data where possible to reduce interference
Wire door contacts so the controller can detect door forced and door held events
Use shielded cable for a Wiegand interface on longer runs and follow length guidelines for RS-485
Label both ends of every cable and record the panel terminal numbers
App And Web Configuration
You can onboard devices quickly with a QR code and Bluetooth, then manage day to day tasks in the HIK-Connect Teams app or via the web.
Step by step
Scan the QR code to add the device to your project
Pair over Bluetooth and set network details
Name devices with clear labels such as Level 1 West Door
Create time profiles, for example Office Hours 08:00 to 18:00 Monday to Friday and Cleaning 18:00 to 22:00
Build user groups for staff, contractors and visitors
Enrol credentials such as MIFARE cards, fingerprints, faces or PIN codes
Enable Anti Passback where strict entry then exit control is needed
Configure interlocking so only one door in a set can be open
Test Open Door from the app and at the reader
Good practice
Document MAC addresses and IP addresses early
Change default passwords and rotate admin credentials
Set the correct door contact type and held open time to reduce nuisance alarms
Schedule attendance reports and send them to HR
Use role based permissions so only authorised people can change settings
Video tutorials and help resources can speed up learning, especially for first time installers.
Integrations And Cloud Management
Hikvision access pairs cleanly with other security devices and can be managed centrally.
What you can integrate
Cameras for visual verification and event linked recording
Door Stations And Indoor Stations for visitor management
Alarms to trigger alerts for door forced and door held events
NVR Or VMS tie ins where you want unified playback and audit
Manage devices from anywhere through web based configuration
Review logs, add users and adjust schedules without visiting the site
Use API or export tools where you need to synchronise staff lists
Testing Safety And Emergency Modes
Commissioning checklist
Confirm the door contact changes state within one second of movement
Check lock and reader voltage while the door is operating
Verify Anti Passback across all doors in the zone by running a simple entry and exit test
Test door forced and door held alarms and confirm alerts reach the right people
Confirm that Open Door works from both the app and the physical reader
Emergency access
Configure selected doors to unlock automatically during an evacuation
Trigger the unlock from a monitored fire input or a software profile
Test quarterly and document the steps in your safety plan so people know the sequence
Health screening options
Recognition terminals can detect elevated skin surface temperature and mask wearing, which some sites adopted during the pandemic. Treat these as policy tools that sit alongside access control rather than medical devices.
Reporting And Maintenance
Attendance and audits
Access events are recorded automatically and can be exported for time and attendance reporting
Filters let you find a person’s visits, a door’s history or the time window around an incident
Routine maintenance
Inspect readers and terminals monthly and clean sensors with appropriate wipes
Back up configuration and export user lists after significant changes
Update firmware during planned windows and keep a rollback image
Test exit buttons, door closers and locks, and replace worn parts before failure
Performance tips
Keep average face recognition time below 500 milliseconds on modern terminals
Aim for controller to server latency below 50 milliseconds on local networks
Use clear device names in software and on labels to speed up fault finding
Product cheat sheet
Use this table to match models to roles, interfaces and credentials. It’s formatted for quick scanning.
Model
Type
Typical use
Interfaces
Credentials
Special features
DS-K1T105AM
Single door attendant controller
Small offices and storerooms
TCP/IP, RS-485, Wiegand interface
Card, PIN
Simple web configure, compact design
DS-K2604-G
Four door access controller
SMB sites and campuses
TCP/IP, RS-485, Wiegand interface
Depends on connected readers
Multi door interlocking, anti passback
DS-K1T341AM
Face access terminal
Main entries and reception
TCP/IP, RS-485, Wiegand interface
Face, card, PIN
Deep learning recognition
DS-K1T341AMF
Face and fingerprint terminal
Staff entrances and secure doors
TCP/IP, RS-485, Wiegand interface
Face, fingerprint, card, PIN
Multi factor combinations
DS-K1T606MF
Face recognition terminal
High traffic doors
TCP/IP, RS-485
Face, card, PIN
5 inch touch screen, 2 MP WDR camera
DS-K1T502DBWX-C
Video intercom terminal
Mixed intercom and access
TCP/IP, Bluetooth
MIFARE card, PIN
Built in MIFARE module, Bluetooth support
DS-K1104MK
Vandal proof card reader
External entries and carparks
Wiegand interface
MIFARE card
50 mm read range, IP65 rating
DS-K1201MF
Fingerprint and card reader
Staff entrances and secure rooms
Wiegand interface
Fingerprint, MIFARE card
50 mm read range, IP65 rating
Remember
Exit buttons in aluminium and stainless steel styles, with monitored request to exit for higher security
Door contacts and break glass units to meet relevant site and building requirements
FAQs
Can I Mix Recognition Terminals And Simple Card Readers On The Same Door
Yes. Use the controller’s Wiegand interface to connect different readers. A common pattern is a recognition terminal on entry and a simple exit device on the inside.
Do I Need Multi Factor Authentication On External Doors
It is recommended. Pair face or fingerprint with a card or a PIN code on perimeter entries. Reserve single factor for low risk internal doors.
How Do I Set Up Evacuation Auto Unlock
Create an emergency profile, select the doors to open, and link it to a monitored fire input or a software trigger in the app. Test quarterly and record the results.
Which Controllers Support Interlocking
The DS-K2604-G supports Multi Door Interlocking out of the box. Use interlocking for airlocks, security cages and plant rooms.
Which App Should I Use For Day To Day Management
Use the HIK-Connect Teams app to add users, issue cards, adjust schedules and open doors remotely. For deeper configuration use each device’s web pages.
Implementation Checklist
Confirm door list, controller locations, power supply sizes and cable routes
Choose terminals and readers per door based on risk, convenience and environment
Plan Multi Door Interlocking and Anti Passback zones
Onboard by QR code and Bluetooth, then refine in the app and the web
Verify logs, attendance, alarms and reports with a live test user
Train reception on door station and indoor station procedures
Document the configuration and store backups safely
Conclusion
Need Help Designing, Installing Or Upgrading Hikvision Access Control In Perth? Castle Security can plan your doors, supply the right controllers and terminals, integrate cameras and intercoms, and configure the app so your team can have a complete access control system without stress.
When he’s not providing quotes to our clients or juggling the management of Castle Security, Louis is working with the Marketing Team on the website or out talking to clients. For over 12 years, Louis has been at the forefront of new business.
Louis Thorp
When he’s not providing quotes to our clients or juggling the management of Castle Security, Louis is working with the Marketing Team on the website or out talking to clients. For over 12 years, Louis has been at the forefront of new business.